
Recently I got a requirement to add a new disk to an existing CentOS 7 server. The server was running out of space. So I purchased a 2 TB SAS Hard disk. It was a production server and because of that I have to do this activity without a downtime or server reboot.
The following are the steps that I performed to add the new disk. These steps will work with most of the linux distributions like RHEL, CentOS, Oracle Linux, Rocky Linux, Ubuntu etc.
Step 1: Insert/ install the new disk in the server
Insert new disk in the server. Mine was a Dell Power Edge server. After inserting the disk, I opened the Dell IDRAC (a web portal in the BIOS to manage the entire system) and checked the status of the new disk.
I can see the new disk under the physical disks.
Step 2: Create a Virtual disk
Create Virtual disk using the Dell iDRAC portal. The portal has option to create new Virtual disk. Once the operation is complete, we are good to go with the next steps.
Step 3: Verify the newly installed disk from the command line
Open the command line of the machine. Type the following command to see the list of disks and partitions.
lsblkFor example in my case I got the following output. From this output, ensure that the new disk is listed. In my case sdc was the new disk.

Now to get a detailed view of disks, partitions and configurations use the following command.
fdisk -lA sample output of the above command is given below.

Step 4: Create partition in the newly added disk
We have completed the verification of the new disk. Now it is time to create partitions in the newly added disk.
In this case, we will be creating a new partition and saving the changes to the disk.
The command and the sub options are given below.
fdisk /dev/sdcHere /dev/sdc is the disk device name. In my case, the disk device name is /dev/sdc, it could be different in your case like /dev/sdb or something else. In some cases, it will show up as xvdb, xvdc etc (depends on physical disk or virtual disk).
So do not copy paste the above command without checking the disk name.
This command will ask for options. The available options with fdisk command are given below.
- n – Create partition
- p – print partition table
- d – delete a partition
- q – exit without saving the changes
- w – write the changes and exit.
Here we are creating a new partition, so we have to choose the option n.

After entering this option, it will further ask us with the type of partition.
The available options are primary (p) and extended (e).
We have to select the option p as our requirement is to create a new primary partition.

After this, it will ask for the partition number. We have options to choose between 1-4. Since this is a new disk and new partition, we will choose 1 (the default option).

The next set of options are for setting the first and last sector in the disk for the new partition. I am going create a single partition in the entire disk. So I will choose the beginning sector as the first sector and the last sector as the end sector.
By default, it will choose the min and max values as the first and last sector. So I am keeping the default options. Keeping the fields empty will pick the default value.

After setting the first and last sector, the partition will get created and you will see the following message “Partition 1 of type Linux and of size XX is set”
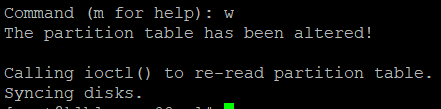
Now we have to save these changes to the disk. The option for writing these changes to disk is w.

Type the option w and hit enter. On successful completion, it will give the following message. “The partition table has been altered! Syncing disks.”
Step 5: Verify the newly created partition
Now after creating the partitions, check the disks and partitions in the machine using the lsblk command. You will be able to see the newly created partition under the new disk. In my case, I can see a partition sdc1 under the disk sdc.
A Sample screenshot is given below.

Now we have the partitions ready. The next step is to format the newly created partition.
Step 6: Format the newly created partition
We will format the newly created partition in this step. We can configure the file system type (ext4, xfs etc) in this step.
Various options to format the disk are available. Depending upon the type, the command slightly changes. The available options are given below.

Here we are going to format the new partition in xfs type.
The command is given below. This command will format the partition /dev/sdc1 in xfs type.
mkfs.xfs /dev/sdc1A sample output of the above command is given below.

After completing the above command, the next step is to mount this newly created partition to the file system.
Step 7: Mount the new disk
To mount the newly created partition, we need to create a directory locally in the Linux machine.
Here I will be creating a directory /data2 in the machine.
mkdir /data2Now we can mount the partition to this directory using the following command. The syntax is
mount <source> <target>. The command is given below.
mount /dev/sdc1 /data2Here /dev/sdc1 is the partition to mount and /data2 is the directory in which it gets mounted to.
Now if you type lsblk command, you will be able to see the mount point also. A sample screenshot is given below.

We will do one more step to do the auto-mount configuration for the new disk in case of any reboot.
Step 7: Configure auto mount for the newly created partition
By default this newly added disk may get unmounted after a reboot or shutdown operation. In order to avoid that, we need to make some configurations in the server.
To enable auto mount of the newly added disk incase of any reboot, we need to add the following configurations in the /etc/fstab file.
Open the /etc/fstab file and add the following entry in the last line of the file.
/dev/sdc1 /data2 xfs defaults 0 0Finally the file will look like the one below. The below screenshot is a sample one. Do not worry about the remaining entries. You only need to ensure the correctness of the last line.

Now save this file and verify the entry by doing the following commands.
We will unmount the newly added disk and mount it back using the entries in the /etc/fstab file. If the mount is properly happening based on the entry in the fstab file, we are good.
The command to unmount is umount
# Unmount the disk
umount /data2

# Verify the unmount operation using the commands lsblk or df -h. You will see the new mountpoint missing
lsblk

# Now perform the mount using the entries in the /etc/fstab file
mount -a

# Now verify the mount points using lsblk or df -h command.
# You will be able to see the newly added disk with mount point
lsblk
Cheers !!!!.
Now we have the new disk available for use. We have successfully completed all the steps without disturbing the system and without a reboot.
I hope this tip is useful. Feel free to comment if you have any suggestions or questions.

Muito bom ! Obrigado